Let me start my saying I love trees! I even consider myself a bit of a tree hugger :) So I look forward to learning how to draw them, I think really old trees with their exposed roots and all make for such intricate and majestic subjects... but before I get carried away lets begin.
In this chapter it’s mostly drawings that demonstrate what Brenda is trying to explain, I will be posting them up as we go along. She also encourages everyone to go out and draw as many different kinds of flowers from all sorts of different angles, concentrating on the different textures of the petals, leaves and middle piece (forget what that’s called.) Below is a beautiful example of this.
Next we jump straight into our first drawing, a rose. Brenda takes us through step by step on how to draw it, see the images below for the steps and how my rose turned out.
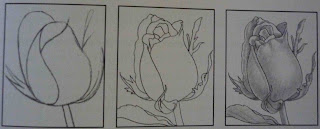 |
| First steps to mapping out your rose |
 |
| Final steps of shading |
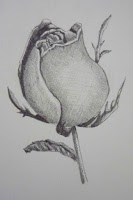 |
| and lastly my rose. |
A tip offered up by the book is; in order to draw a flower accurately you need to be familiar with all sides of it. So if you are taking pictures to draw from, remember to take pictures from many different angles.
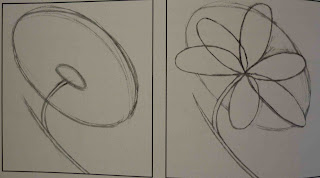
Next we move on to the anatomy of trees, and how to draw them. Each tree is different and unique and by spending some time observing them you will be able to draw their distinctive personalities. Remember that no tree branches are straight or sit at right angles, the book suggests you study the curves and v shapes created by the branches. Apparently if you can draw a V shape you can draw a tree. Below is a great way to start practicing you tree drawings.
Just like flowers, your trees don’t need copied exactly, you can use creative license to choose what you would like to draw to represent your tree’s emotions the best.
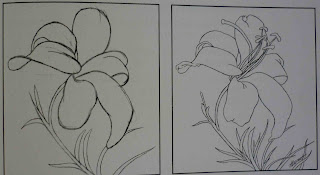
Now onto Project 14: Lovely Lilly. In this exercise Brenda shows us how to simplify an object that is intricate in detail. Below are the visual steps taken to draw the lilly as well as my drawing of the lovely lilly (which i’m very proud of).
 |
| Steps 1 & 2: Simplifying your object |
 |
| Steps 3 & 4: Adding in the details |
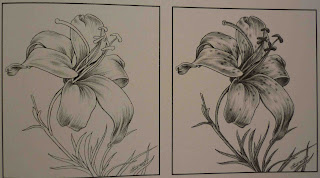 |
| Steps 5 & 6: Adding in the details |
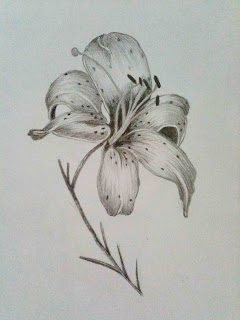 |
| My lilly |
In this exercise I started with a B for my lines, used an HB for the medium shades, a 2B for the darker shades and a 6B for the darkest inner shades.
Next up is Chapter 15 with Documenting the world outside.
(Please note: that photo examples are taken from "Drawing for Dummies by Brenda Hoddinott'' and the above views are not representative of her and are purely based on a 3rd party view being Me! All snippets taken directly from the book are stated as been so)


No comments:
Post a Comment