So It's been a while since my last entry and I never did finish the drawing book but I do have my reasons...
I started my degree in Graphic Design with Marketing last year June, coupled with the fact that I'm a partner in a new company, that my brothers and I only opened a year and a half ago. So I had to take a break just to get to grips with what was needed of me and how I would potentially manage everything! And here I am a few months later and I think I have it all sussed out.
I'm going to pick up with where I left off - Chapter 17 and I think my last drawing I was working on was a baby. Now I wont' have as much time as I did when I first started (even then I was a little slow) but I will complete this task ASAP! I'm almost done now anyway, only 6 more chapters to go!
See you soon!
Sunday, January 29, 2012


Monday, May 16, 2011
Chapter Sixteen - Capturing Critters in Drawings:
Now I must admit, I have never been great at this, especially drawing animal heads! No matter what the species, for the life of me I can’t draw the head. So needless to say I’m a little apprehensive about this chapter, but alas we must move on.
So on to the details...
Below are some points to keep in mind when drawing fur or feathers:
Next up are a few guidelines to drawing long or short fur:
Because fur can be straight, curly, soft, coarse, shiny, matte, spotty or stripped...keep these tips in mind when drawing either long or short fur:
Below is a good example of short, soft, shinny and spotty! Here the direction of the fur helps to define the shape of the dogs head.
 And here is a great example of long, soft, wavy. In this picture it’s not the fur that defines the dogs shape but rather the lighting.
 Our first exercise was drawing the leg of a cat. It helps identify shadows and fur direction and how they play a part in creating the shape/build of an animal.
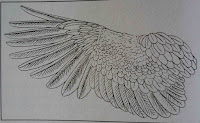
Next up is a few tips on feathers. By understanding the basic shape and construction of a feather, it will help when trying to draw the detail of a wing with increased accuracy. Below is the basic shape of a feather you can see how understanding this will enable you to draw a wing.

 Contrast , lighting and texture play huge roles in the drawing of animals. It helps create the illusion of soft, dark or stripped. See the images below to see how you use these techniques to achieve these illusions.
Project 16: Wings on Water: Here our aim is to draw a swan. Using your 2H pencil you start with the outlines and work your way through the steps. Never go higher than a 2B for your darkest shading. It is a white swan after all.
Our second milestone is complete!
Next is Part 3 of the book - Drawing people.
Chapter 17 starts with the drawing of babies.
(Please note: that photo examples are taken from "Drawing for Dummies by Brenda Hoddinott'' and the above views are not representative of her and are purely based on a 3rd party view being Me! All snippets taken directly from the book are stated as been so)
So on to the details...
Below are some points to keep in mind when drawing fur or feathers:
- Look closely at the direction of either fur or feather and match your sketching lines to the direction you see.
- They will look much more realistic when the shading lines are drawn at different lengths and sizes
- Use curved lines to draw the form of bird or animal
- Pay close attention to light and shadows as well as texture
Next up are a few guidelines to drawing long or short fur:
Because fur can be straight, curly, soft, coarse, shiny, matte, spotty or stripped...keep these tips in mind when drawing either long or short fur:
- For short fur use short, mostly curved, hatching lines and long, curved hatching lines for long hair.
- Hatching is the perfect shading techniques for almost all furs.
- Bold thick lines give the illusion of thick hair and gentle thin lines crete the illusion of soft fur.
Below is a good example of short, soft, shinny and spotty! Here the direction of the fur helps to define the shape of the dogs head.


 |
| Steps One, Two and Three |
 |
| And steps Four, Five and Six |
 |
| My attempt. Verdict need to work on my patience again! |


 |
| Contrast of Dark and light helps create softness in the kitty's fur |
 |
| Lighting helps define the mood and furriness of this pooch |
 |
| Texture helps this white swan take shape while contrast allows it to stand out. |
 |
| Steps One and Two |
 |
| Steps Three and Four |
 |
| Steps five and Six |
 |
| Final rendering...Perfect |
 |
| Again with the head.... I think I might have a problem! |
Next is Part 3 of the book - Drawing people.
Chapter 17 starts with the drawing of babies.
(Please note: that photo examples are taken from "Drawing for Dummies by Brenda Hoddinott'' and the above views are not representative of her and are purely based on a 3rd party view being Me! All snippets taken directly from the book are stated as been so)
Thursday, April 14, 2011
Chapter Fifteen - Documenting the world outside:
In this chapter we explore the sky and it’s various moods as well as lands, oceans and mountains. By taking to the outdoors with you drawing suppliers you’ll have an endless supply of subjects just waiting to be drawn.
Each time you look or go outside during the day take a look at the sky and notice all the different cloud formations there are. Analyse their different shapes, forms and range of values. Below are 3 drawings that Brenda has created to demonstrate the difference in the following skies.

The first drawing shows Clear and Calm: here the illusion of depth is created with atmospheric perspective (see chapter 9). By graduating the shading from dark to light you’re able to achieve this. The second drawing shows shows a stormy and angry sky: here Brenda portrays the skies ability to show anger by drawing dark skies with lighting cracking through the clouds as well as some cloud that tunnels towards the earth with the potential to be a tornado. The third drawing demonstrates cloudy and picturesque: Here Brenda demonstrates the softer side of clouds and manages to portray there fluffiness really well.
You need to think of clouds as 3 dimensional objects, that are effected by shadows and highlights like any other object and in order to draw their perspective right you need to apply the same rules you would for solid objects. The clouds closer to the horizon will appear smaller than the clouds above your head.
A tip offered up by the book suggests adding human elements to your scenes. Be it a chair, a path through a wooded area or actual people themselves. Also feel free and comfortable to modify, rearrange, completely remove or change various parts of you scene in anyway that inspires you!! Drawing is not just about copying what nature has arranged.
Next up is project 15: Dreaming of a white Christmas. Now this project was lots of fun, I think I enjoyed it because it’s like nothing I have ever done before.
Below are the pictures to show you the steps, but in order to show this one properly I’m going to have to write out some of the written instruction so you can see what techniques have been used.
1: Draw a rectangle approx. 10 x 5 inches
2: Shade in the whole rectangle inside with a stick of charcoal, using the side of the stick (as it’s faster).
3: Now take a tissue and gentle rub the whole surface until you achieve a solid tone. (this will lighten your shading a bit)
4: Use your kneaded eraser to begin erasing your light areas i.e. for trees.

5: carrying on using your kneaded eraser to add in the snow more trees and the sky.

6: Switch to your vinyl eraser to add in brighter sharper areas in the trees, sky, snow river etc.

7: Use your charcoal pencil to add in your darker areas

and Voila... a beautiful winter scene.
Next we face the challenges of capturing critters in chapter 16! I think this one will be tough, it's safe to say I suck at drawing animals.
(Please note: that photo examples are taken from "Drawing for Dummies by Brenda Hoddinott'' and the above views are not representative of her and are purely based on a 3rd party view being Me! All snippets taken directly from the book are stated as been so)
Each time you look or go outside during the day take a look at the sky and notice all the different cloud formations there are. Analyse their different shapes, forms and range of values. Below are 3 drawings that Brenda has created to demonstrate the difference in the following skies.

The first drawing shows Clear and Calm: here the illusion of depth is created with atmospheric perspective (see chapter 9). By graduating the shading from dark to light you’re able to achieve this. The second drawing shows shows a stormy and angry sky: here Brenda portrays the skies ability to show anger by drawing dark skies with lighting cracking through the clouds as well as some cloud that tunnels towards the earth with the potential to be a tornado. The third drawing demonstrates cloudy and picturesque: Here Brenda demonstrates the softer side of clouds and manages to portray there fluffiness really well.
You need to think of clouds as 3 dimensional objects, that are effected by shadows and highlights like any other object and in order to draw their perspective right you need to apply the same rules you would for solid objects. The clouds closer to the horizon will appear smaller than the clouds above your head.
A tip offered up by the book suggests adding human elements to your scenes. Be it a chair, a path through a wooded area or actual people themselves. Also feel free and comfortable to modify, rearrange, completely remove or change various parts of you scene in anyway that inspires you!! Drawing is not just about copying what nature has arranged.
Next up is project 15: Dreaming of a white Christmas. Now this project was lots of fun, I think I enjoyed it because it’s like nothing I have ever done before.
Below are the pictures to show you the steps, but in order to show this one properly I’m going to have to write out some of the written instruction so you can see what techniques have been used.
1: Draw a rectangle approx. 10 x 5 inches
2: Shade in the whole rectangle inside with a stick of charcoal, using the side of the stick (as it’s faster).
3: Now take a tissue and gentle rub the whole surface until you achieve a solid tone. (this will lighten your shading a bit)
4: Use your kneaded eraser to begin erasing your light areas i.e. for trees.

5: carrying on using your kneaded eraser to add in the snow more trees and the sky.

6: Switch to your vinyl eraser to add in brighter sharper areas in the trees, sky, snow river etc.

7: Use your charcoal pencil to add in your darker areas

and Voila... a beautiful winter scene.
 |
| My winter scene |
(Please note: that photo examples are taken from "Drawing for Dummies by Brenda Hoddinott'' and the above views are not representative of her and are purely based on a 3rd party view being Me! All snippets taken directly from the book are stated as been so)
Chapter Fourteen - Saving the Joy of Flowers and Trees:
Let me start my saying I love trees! I even consider myself a bit of a tree hugger :) So I look forward to learning how to draw them, I think really old trees with their exposed roots and all make for such intricate and majestic subjects... but before I get carried away lets begin.
In this chapter it’s mostly drawings that demonstrate what Brenda is trying to explain, I will be posting them up as we go along. She also encourages everyone to go out and draw as many different kinds of flowers from all sorts of different angles, concentrating on the different textures of the petals, leaves and middle piece (forget what that’s called.) Below is a beautiful example of this.

Next we jump straight into our first drawing, a rose. Brenda takes us through step by step on how to draw it, see the images below for the steps and how my rose turned out.
A tip offered up by the book is; in order to draw a flower accurately you need to be familiar with all sides of it. So if you are taking pictures to draw from, remember to take pictures from many different angles.
Next we move on to the anatomy of trees, and how to draw them. Each tree is different and unique and by spending some time observing them you will be able to draw their distinctive personalities. Remember that no tree branches are straight or sit at right angles, the book suggests you study the curves and v shapes created by the branches. Apparently if you can draw a V shape you can draw a tree. Below is a great way to start practicing you tree drawings.

Just like flowers, your trees don’t need copied exactly, you can use creative license to choose what you would like to draw to represent your tree’s emotions the best.
Now onto Project 14: Lovely Lilly. In this exercise Brenda shows us how to simplify an object that is intricate in detail. Below are the visual steps taken to draw the lilly as well as my drawing of the lovely lilly (which i’m very proud of).
In this exercise I started with a B for my lines, used an HB for the medium shades, a 2B for the darker shades and a 6B for the darkest inner shades.
Next up is Chapter 15 with Documenting the world outside.
(Please note: that photo examples are taken from "Drawing for Dummies by Brenda Hoddinott'' and the above views are not representative of her and are purely based on a 3rd party view being Me! All snippets taken directly from the book are stated as been so)
In this chapter it’s mostly drawings that demonstrate what Brenda is trying to explain, I will be posting them up as we go along. She also encourages everyone to go out and draw as many different kinds of flowers from all sorts of different angles, concentrating on the different textures of the petals, leaves and middle piece (forget what that’s called.) Below is a beautiful example of this.

 |
| First steps to mapping out your rose |
 |
| Final steps of shading |
 |
| and lastly my rose. |
Next we move on to the anatomy of trees, and how to draw them. Each tree is different and unique and by spending some time observing them you will be able to draw their distinctive personalities. Remember that no tree branches are straight or sit at right angles, the book suggests you study the curves and v shapes created by the branches. Apparently if you can draw a V shape you can draw a tree. Below is a great way to start practicing you tree drawings.

Just like flowers, your trees don’t need copied exactly, you can use creative license to choose what you would like to draw to represent your tree’s emotions the best.
Now onto Project 14: Lovely Lilly. In this exercise Brenda shows us how to simplify an object that is intricate in detail. Below are the visual steps taken to draw the lilly as well as my drawing of the lovely lilly (which i’m very proud of).
 |
| Steps 1 & 2: Simplifying your object |
 |
| Steps 3 & 4: Adding in the details |
 |
| Steps 5 & 6: Adding in the details |
 |
| My lilly |
Next up is Chapter 15 with Documenting the world outside.
(Please note: that photo examples are taken from "Drawing for Dummies by Brenda Hoddinott'' and the above views are not representative of her and are purely based on a 3rd party view being Me! All snippets taken directly from the book are stated as been so)
Wednesday, March 23, 2011
Chapter Thirteen - Day Sixteen: Setting up to Draw a Still Life
In this chapter, we are going to cover what subjects to choose when setting up a still life and how to light your composition. Now most people think of fruit, flowers or ornamental objects when thinking still life, this refers to traditional subjects, but that’s not the case. There is so much out there, the opportunities are endless, anything that you draw that is modern is considered to be contemporary.
Anything can provide a great subject matter for a still life, the book mentions your lunch for example. Take an apple and sketch it, then take a bite and sketch it again and carry on till you get all the way down to the core! Obviously not something you want to do if your hungry.
Below are some of Brenda’s drawings showing you how glass and crystal can make great drawing subjects. The difference/contrast in the values you need to draw, in order to make it look realistic, create a great challenge.

Old antique objects or any weathered and worn objects make for great subjects. Remember that you can unify a still life drawing by grouping objects by theme, say for instance garden tools, kitchen utensils etc. Don’t forget that nothing is stopping you from using you imagination and altering objects to create something a little different. See Brenda’s drawings below on what can be done.

A tip the book provides, is to always look for symmetry in the subjects you choose for a still life. In order to help you get both sides of your object the same the book offers another tip. Say you drawing a vase. Do your rough sketch, then take your ruler and make a vertical line down the middle. Choose a side of the vase you prefer, and lighten your sketch lines and tidy the lines up. Erase the rough sketch on the other side of the drawing. Use your ruler to draw a horizontal line anywhere across your vase, this will just help with placement a few steps on. Take tracing paper and trace, using dark lines, all the lines of your drawing - including the horizontal and vertical lines. Flip you tracing paper over, match your lines up and draw over your vase to transfer the drawing to your sketch pad. Now you have a perfectly symmetrical vase.
Another factor to take in to account when setting up your still life, is the lighting. Most times people light it from either the left or right side of the objects, bringing it either a little to the front or back or even slightly raised or lowered, offers brilliant subtle differences that are worth experimenting with. Other options are; back lighting, this creates quite a dramatic effect, as well as lighting directly from the front. Both these lighting techniques will create stronger cast shadows and less detail on the actual object.
On to Project 13: Drawing a still life! Sure you guessed that one already.
Here the assignment is pretty simple. Take any object, arrange it however you like, set up your lighting and draw.
I decided to take on the challenge of a glass object, unfortunately I didn’t have any tracing paper with me so I had to wing it! Below is my attempt at a still life.

Next we move on to Chapter 14: Saving the Joy of flowers and Trees.
(Please note: that photo examples are taken from "Drawing for Dummies by Brenda Hoddinott'' and the above views are not representative of her and are purely based on a 3rd party view being Me! All snippets taken directly from the book are stated as been so)
Anything can provide a great subject matter for a still life, the book mentions your lunch for example. Take an apple and sketch it, then take a bite and sketch it again and carry on till you get all the way down to the core! Obviously not something you want to do if your hungry.
Below are some of Brenda’s drawings showing you how glass and crystal can make great drawing subjects. The difference/contrast in the values you need to draw, in order to make it look realistic, create a great challenge.

Old antique objects or any weathered and worn objects make for great subjects. Remember that you can unify a still life drawing by grouping objects by theme, say for instance garden tools, kitchen utensils etc. Don’t forget that nothing is stopping you from using you imagination and altering objects to create something a little different. See Brenda’s drawings below on what can be done.

A tip the book provides, is to always look for symmetry in the subjects you choose for a still life. In order to help you get both sides of your object the same the book offers another tip. Say you drawing a vase. Do your rough sketch, then take your ruler and make a vertical line down the middle. Choose a side of the vase you prefer, and lighten your sketch lines and tidy the lines up. Erase the rough sketch on the other side of the drawing. Use your ruler to draw a horizontal line anywhere across your vase, this will just help with placement a few steps on. Take tracing paper and trace, using dark lines, all the lines of your drawing - including the horizontal and vertical lines. Flip you tracing paper over, match your lines up and draw over your vase to transfer the drawing to your sketch pad. Now you have a perfectly symmetrical vase.
Another factor to take in to account when setting up your still life, is the lighting. Most times people light it from either the left or right side of the objects, bringing it either a little to the front or back or even slightly raised or lowered, offers brilliant subtle differences that are worth experimenting with. Other options are; back lighting, this creates quite a dramatic effect, as well as lighting directly from the front. Both these lighting techniques will create stronger cast shadows and less detail on the actual object.
On to Project 13: Drawing a still life! Sure you guessed that one already.
Here the assignment is pretty simple. Take any object, arrange it however you like, set up your lighting and draw.
I decided to take on the challenge of a glass object, unfortunately I didn’t have any tracing paper with me so I had to wing it! Below is my attempt at a still life.

(Please note: that photo examples are taken from "Drawing for Dummies by Brenda Hoddinott'' and the above views are not representative of her and are purely based on a 3rd party view being Me! All snippets taken directly from the book are stated as been so)
Tuesday, March 22, 2011
Chapter Twelve - I have no idea what day it is anymore: Drawing from your Memories:
Now according to the book drawing from memory opens up a whole new world of drawing opportunities, because all your subjects are safely tucked away in you mind ready to be used anytime day or night. Problem is that I think mine are so tucked away I’m not sure where to find them anymore.
There is a process you use in order to capture an image, in your mind, to be able to successfully draw it at a later stage. The process is as follows: One, use your vision (I really would have never), take a good long hard look. Two - Perception, this the way in which you process and understand the sensory information been fed back to you. In order to fine tune your art of seeing, feed your memory as much information using all your senses, sight, smell, hearing, feeling (if you can), tasting (again only if you can, not to sure a good lick of bark or grass on a summers morning is a great way to understand a subject, but you get the point). Taking time to really see an object helps with been able to recall it later, the longer you spend studying a subject the easier it will be to recall it.
A few tips the book mentions; always try observe your subject at eye level, until your skills of visual memory are really good and well exercised. Eye level is the easiest way in which to remember something. Also look at your subject from as many viewpoints as possible, back, front and side views and also concentrate on the distance you are from your subject. More than 30 to 40 feet away you might not get all the details you need and too close you will loose the outlines you need in order to draw the subject later. Ideally you need to be far enough to see the whole subject but close enough to see the detail as well.
Remember that perception, experiences and memories can distort the way the brain stores information, even though your eyes record the image as it is. So knowing and studying your subject is important in helping you develop your visual memory. Your memory is fragile and at first your drawings won’t look like the actual subject, but that’s why sketching from physical objects helps with the accuracy of your memory.
You can practice your visual skills at home with any object around the house. Take a good look at, say, your lamp, when you think you’ve got all the information you need try sitting down and drawing it.
On to Project 12: Drawing a verbal memory:
This project was hilarious, I can honestly say my verbal memory is shocking! And if I where the worlds only forensic artist you could count on the fact that no criminal would ever be caught!
The project lists out a verbal description of a potential suspect: White male, 25 to 35 years old, wearing a slightly coloured crew neck shirt. Long thin rectangular face, high cheekbones and a square jaw with a large chin. He has stubble on the lower part of his face. His hair is medium brown, straight and thin. It hangs on his forehead, is wispy, messy and looks dirty or wet. Normal ears, with a loop earring in his left ear. Wrinkles on the forehead. Dark thick, bushy eyebrows that almost covered his whole face. Dark, small creepy eyes and a wide fat nose with big nostrils. Mean looking mouth with a thin top lip and fat bottom lip.
So armed with this information I set out to draw my criminal, the book coaches you through a few steps like, first draw and egg shape for the face, then draw the outer facial features, bottom and then upper features.
Needles to say I came nowhere close, but had a good laugh when I saw what the suspect should look like :)
Next we move on to Chapter 13 and still lives!
(Please note: that photo examples are taken from "Drawing for Dummies by Brenda Hoddinott'' and the above views are not representative of her and are purely based on a 3rd party view being Me! All snippets taken directly from the book are stated as been so)
There is a process you use in order to capture an image, in your mind, to be able to successfully draw it at a later stage. The process is as follows: One, use your vision (I really would have never), take a good long hard look. Two - Perception, this the way in which you process and understand the sensory information been fed back to you. In order to fine tune your art of seeing, feed your memory as much information using all your senses, sight, smell, hearing, feeling (if you can), tasting (again only if you can, not to sure a good lick of bark or grass on a summers morning is a great way to understand a subject, but you get the point). Taking time to really see an object helps with been able to recall it later, the longer you spend studying a subject the easier it will be to recall it.
A few tips the book mentions; always try observe your subject at eye level, until your skills of visual memory are really good and well exercised. Eye level is the easiest way in which to remember something. Also look at your subject from as many viewpoints as possible, back, front and side views and also concentrate on the distance you are from your subject. More than 30 to 40 feet away you might not get all the details you need and too close you will loose the outlines you need in order to draw the subject later. Ideally you need to be far enough to see the whole subject but close enough to see the detail as well.
Remember that perception, experiences and memories can distort the way the brain stores information, even though your eyes record the image as it is. So knowing and studying your subject is important in helping you develop your visual memory. Your memory is fragile and at first your drawings won’t look like the actual subject, but that’s why sketching from physical objects helps with the accuracy of your memory.
You can practice your visual skills at home with any object around the house. Take a good look at, say, your lamp, when you think you’ve got all the information you need try sitting down and drawing it.
On to Project 12: Drawing a verbal memory:
This project was hilarious, I can honestly say my verbal memory is shocking! And if I where the worlds only forensic artist you could count on the fact that no criminal would ever be caught!
The project lists out a verbal description of a potential suspect: White male, 25 to 35 years old, wearing a slightly coloured crew neck shirt. Long thin rectangular face, high cheekbones and a square jaw with a large chin. He has stubble on the lower part of his face. His hair is medium brown, straight and thin. It hangs on his forehead, is wispy, messy and looks dirty or wet. Normal ears, with a loop earring in his left ear. Wrinkles on the forehead. Dark thick, bushy eyebrows that almost covered his whole face. Dark, small creepy eyes and a wide fat nose with big nostrils. Mean looking mouth with a thin top lip and fat bottom lip.
So armed with this information I set out to draw my criminal, the book coaches you through a few steps like, first draw and egg shape for the face, then draw the outer facial features, bottom and then upper features.
Needles to say I came nowhere close, but had a good laugh when I saw what the suspect should look like :)
 |
| Not to sure who this is - I think the only thing I got right was the loop earring. |
 |
| The suspect! |
(Please note: that photo examples are taken from "Drawing for Dummies by Brenda Hoddinott'' and the above views are not representative of her and are purely based on a 3rd party view being Me! All snippets taken directly from the book are stated as been so)
Wednesday, March 9, 2011
Chapter Eleven - Day Twelve to Fourteen: Recording Your Life in a Sketchbook
Get ready to go mobile! Being able to carry your sketching goodies around with you opens up a whole new arena of subjects and objects to draw. Mix in the fact that you do not have to draw exactly what you see opens so many creative doorways.
Preparing your portable studio is pretty easy and does not need to weigh a ton or be half the size of you. Firstly get your self a hardcover sketchbook, the hardcover will act as a drawing board and protect your drawings from becoming tattered or ruined. You will also need a pencil case to carry all your drawing equipment in like pencils, erasers etc. A really good suggestion that the book makes is that if you want to work in other mediums i.e. charcoal, that are a bit messy, be sure to pack in some wet wipes and paper towels for a bit of a clean up afterwards.
Next if you will be drawing in a public place, take your iPod or a similar device with, having your music with you will block out the distractions around you but also keep nosey people at a distance as most times the don’t approach you if they see earphones in your ears. An extra tip if you prefer to draw on sheets of paper as apposed to a sketchbook, you will need to get a drawing board (you can even make one with ply wood yourself) and clips to hold your paper to your board.
No matter where you go you will find things to draw, weather it be at your local pub, cafe’ or at a bird park near by, find a place where you are comfortable and happy to sit for a few hours and draw. Now there is a technique to being able to capture your subject because most times they don’t just sit still and wait for you to finish. There are two techniques that the book identifies with, a rough sketch and a gesture. A rough sketch and I quote “Quickly and efficiently illustrates the forms, shapes, and/or values of any scene, object or living being, with very few details. A gesture “uses simple sketching methods to capture the past, present or potential movement of living beings” Keep in mind though that even these techniques take time and practice to master.
Sketching your subject with simple lines becomes the key focus when trying to capture objects/subjects that are always changing. With only a few strategically placed lines you can capture the information quickly and effectively (two words that are popping up all over the place). Below are a few images that demonstrate what is meant by just a few simple lines.

Once you’ve captures your subject with a few lines next you need to add a a bit of shading, a few rough hatching lines to fill in the shadows and mid colour ranges will be perfect. Again below are a few pictures that demonstrate this, not to sure if they can even be considered rough but alas maybe one day mine will look like this too.

The book assures me that developing you own sketching style will happen over time and takes practice and the method I chose is entirely up to personal preference. It encourages me to try many different styles, just lines, lines and shading, just shading or a techniques known as spiraling.

In order to practice your sketching, both in technique and time, there is a exercise you can do. You’ll need a timer for this one and all your drawing goodies. You start with one minute sketches and work your way up to a five minute sketch, each time the timer goes grab a new piece of paper and subject or just change the angle of the subject your already drawing. Remember to look at your subject often as your drawing, work quickly but most importantly efficiently (Again with those words - I'm definitely starting to see a trend). Start with non-living subjects until your skill has been refined a little and then move on to living subjects.
Project 11: Teddy Tink.
Can I just start off by saying that this is by far the best sketch I have ever produced, I’m so chuffed with myself I think I might just frame it! I'm holding out hope that this book/ Brenda Hoddinott really can teach you to draw.
Project 11 takes you through the steps of drawing a teddy bear. Starting with just your outlines and slowly building up on that. For my sketch I used a 2H for the lighter fur, and 2B for the darker bits and a 6B for the eyes. Remember to add in your highlights as you drawing so to keep them white - I struggled a little with this but all in all I think it turned out OK!
Next in Chapter 12 we cover the technique on how to draw from your memory! This could be interesting as my memory rarely extends past what I had for breakfast.
(Please note: that photo examples are taken from "Drawing for Dummies by Brenda Hoddinott'' and the above views are not representative of her and are purely based on a 3rd party view being Me! All snippets taken directly from the book are stated as been so)
Preparing your portable studio is pretty easy and does not need to weigh a ton or be half the size of you. Firstly get your self a hardcover sketchbook, the hardcover will act as a drawing board and protect your drawings from becoming tattered or ruined. You will also need a pencil case to carry all your drawing equipment in like pencils, erasers etc. A really good suggestion that the book makes is that if you want to work in other mediums i.e. charcoal, that are a bit messy, be sure to pack in some wet wipes and paper towels for a bit of a clean up afterwards.
Next if you will be drawing in a public place, take your iPod or a similar device with, having your music with you will block out the distractions around you but also keep nosey people at a distance as most times the don’t approach you if they see earphones in your ears. An extra tip if you prefer to draw on sheets of paper as apposed to a sketchbook, you will need to get a drawing board (you can even make one with ply wood yourself) and clips to hold your paper to your board.
No matter where you go you will find things to draw, weather it be at your local pub, cafe’ or at a bird park near by, find a place where you are comfortable and happy to sit for a few hours and draw. Now there is a technique to being able to capture your subject because most times they don’t just sit still and wait for you to finish. There are two techniques that the book identifies with, a rough sketch and a gesture. A rough sketch and I quote “Quickly and efficiently illustrates the forms, shapes, and/or values of any scene, object or living being, with very few details. A gesture “uses simple sketching methods to capture the past, present or potential movement of living beings” Keep in mind though that even these techniques take time and practice to master.
Sketching your subject with simple lines becomes the key focus when trying to capture objects/subjects that are always changing. With only a few strategically placed lines you can capture the information quickly and effectively (two words that are popping up all over the place). Below are a few images that demonstrate what is meant by just a few simple lines.

Once you’ve captures your subject with a few lines next you need to add a a bit of shading, a few rough hatching lines to fill in the shadows and mid colour ranges will be perfect. Again below are a few pictures that demonstrate this, not to sure if they can even be considered rough but alas maybe one day mine will look like this too.

The book assures me that developing you own sketching style will happen over time and takes practice and the method I chose is entirely up to personal preference. It encourages me to try many different styles, just lines, lines and shading, just shading or a techniques known as spiraling.
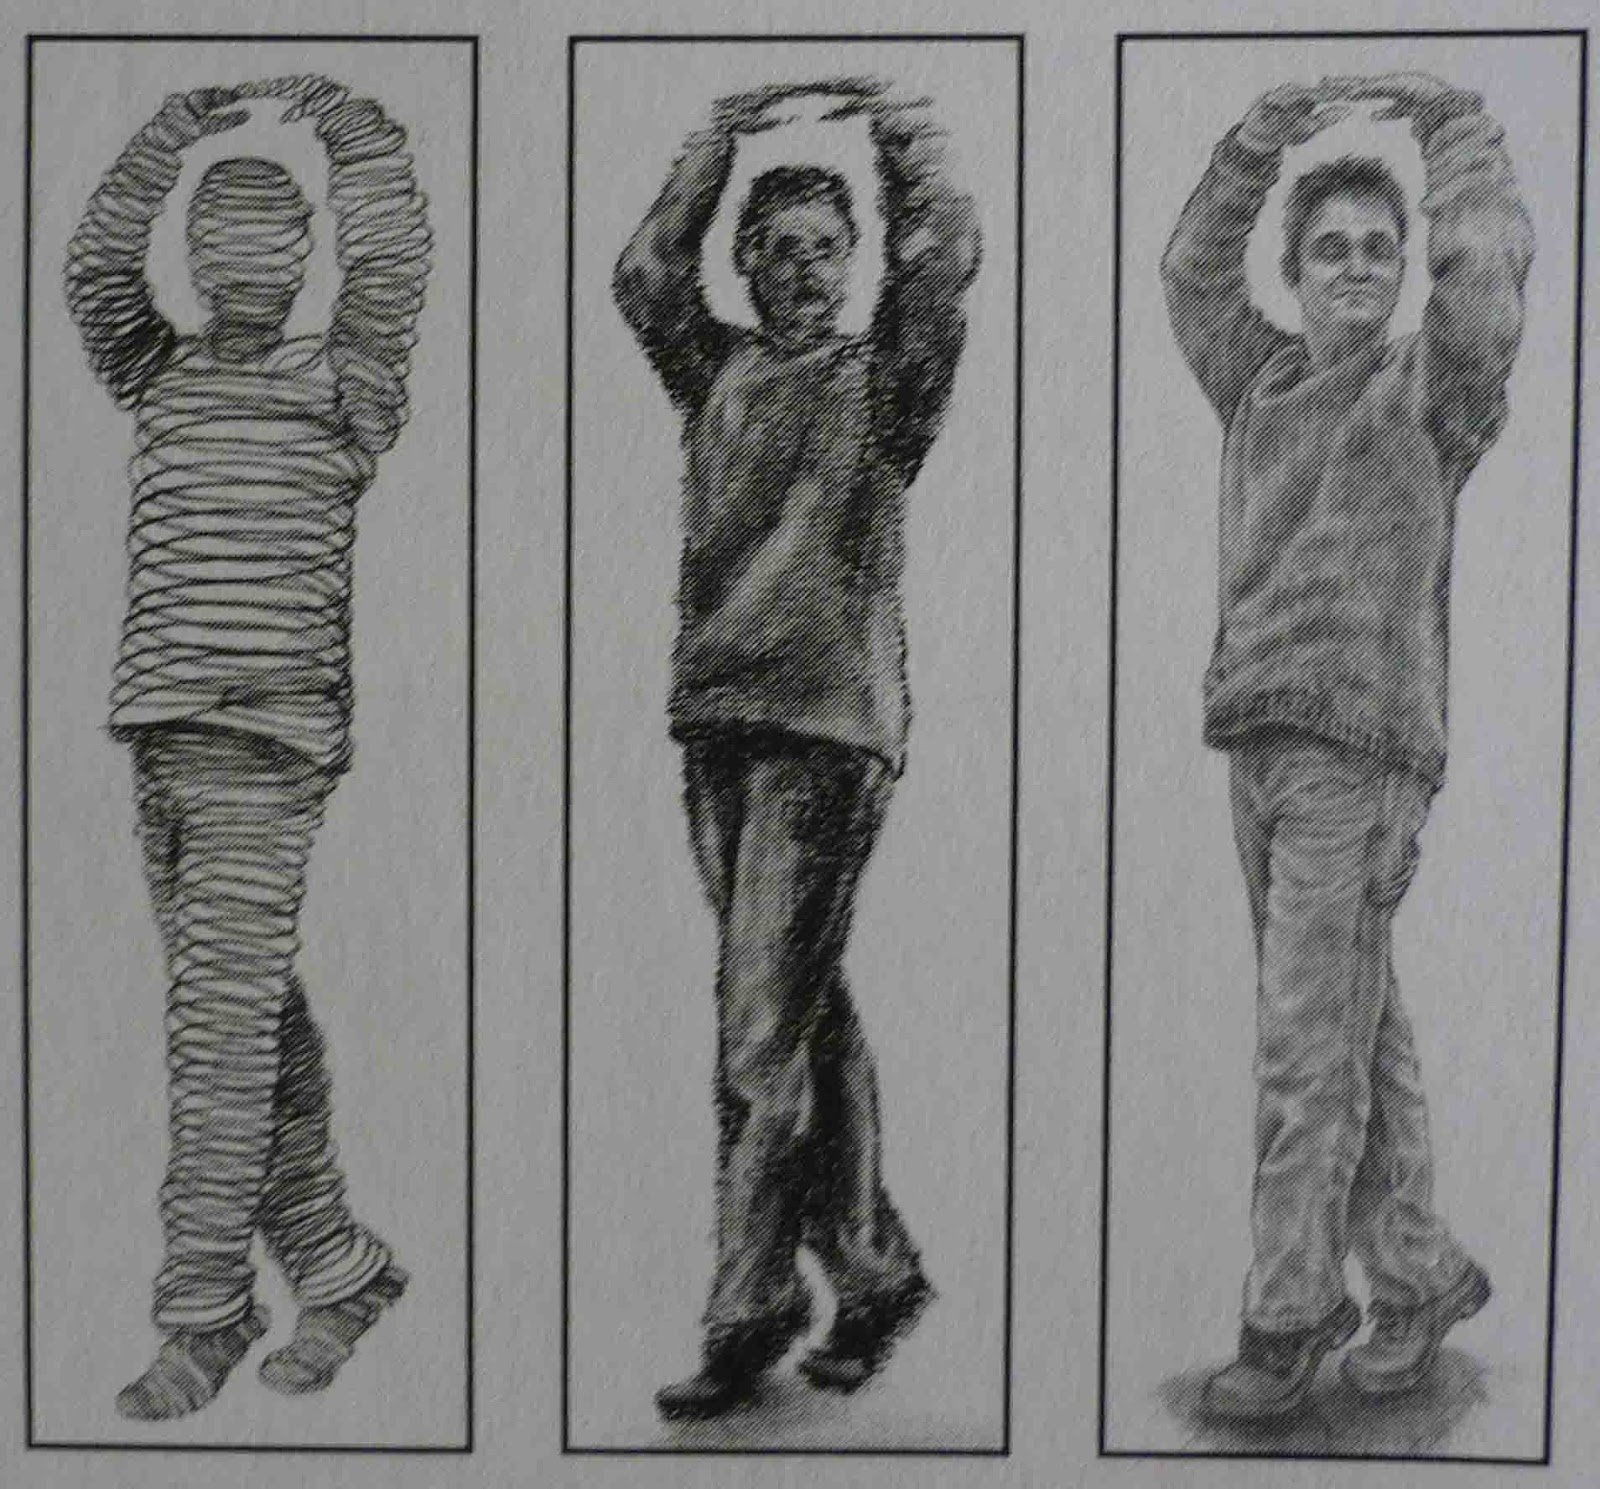
In order to practice your sketching, both in technique and time, there is a exercise you can do. You’ll need a timer for this one and all your drawing goodies. You start with one minute sketches and work your way up to a five minute sketch, each time the timer goes grab a new piece of paper and subject or just change the angle of the subject your already drawing. Remember to look at your subject often as your drawing, work quickly but most importantly efficiently (Again with those words - I'm definitely starting to see a trend). Start with non-living subjects until your skill has been refined a little and then move on to living subjects.
Project 11: Teddy Tink.
Can I just start off by saying that this is by far the best sketch I have ever produced, I’m so chuffed with myself I think I might just frame it! I'm holding out hope that this book/ Brenda Hoddinott really can teach you to draw.
Project 11 takes you through the steps of drawing a teddy bear. Starting with just your outlines and slowly building up on that. For my sketch I used a 2H for the lighter fur, and 2B for the darker bits and a 6B for the eyes. Remember to add in your highlights as you drawing so to keep them white - I struggled a little with this but all in all I think it turned out OK!
 |
| Step One: The outlines |
 |
| Step Two: Defining the shape |
 |
| Starting with the fur |
 |
| Adding the finishing touches |
 |
| My Teddy!! Not quite the same in size but that's OK, aren't we all a little different. |
(Please note: that photo examples are taken from "Drawing for Dummies by Brenda Hoddinott'' and the above views are not representative of her and are purely based on a 3rd party view being Me! All snippets taken directly from the book are stated as been so)
Wednesday, March 2, 2011
Chapter Ten - Day Eleven: Planning your drawings
As we enter part 3 of the book, I’m feeling strangely optimistic and excited. Part 3 is labelled ‘Time to Start Drawing‘ and the topic up for discussion is planning your drawing. So lets get started!
In order to plan your drawing you need to concentrate on composition and the book highlights 7 elements of composition, these are listed as follows:
Focal point: Your primary center of interest
Overlapping: Visual separation between fore and background
Negative space: The empty space within your drawing
Lines: These guide the viewer through your drawing
Balance: A stable balance of objects within your composition.
Contrast: Difference between your light and dark values
Proportion: The amount of space allocated to the various components of a drawing.
Sounds like a lot to take in but if you grab a picture of a painting done by a fairly good artist it will be quite easy to pick out all the above points within that picture. Next Brenda explains how to go about placing your focal point within the picture and how to emphasise it. I will warn you now that this chapter is full of tips, so this might be a long one...
There are a few rules when working with your focal point; number one - always place your focal point off center, if you place your subject in the middle it will command all the viewers attention. Rule number two - Make good use of secondary focal points, by drawing less interesting objects around your focal point you help direct the viewers attention back to you focal point. Rule three - Use objects within your drawing to point to your focal point, i.e a fence or road etc and rule four - draw your focal point in more detail and with greater contrast to the rest of the objects within your drawing.
So far so good, it’s not all that complicating now comes the most important rule of all, the rule of thirds! Anyone doing photography will know this rule all to well already. The rule of thirds is really simple and the best way to describe it is to show you. In the picture below where the circles are drawn at the overlapping intersections is the best place to place your focal point/main subject. Simple!
 The book explains about leading lines and how different lines create different effects/emotions as explained in chapter 5, so I'm not going to go into too much detail. One tip worth mentioning though is that most viewers look at a drawing from the lower left hand corner which makes this the ideal place to have your leading line. If you place your leading line on the right side of your drawing it may lead the viewers eye out your picture. It also suggests not to place your leading line in a corner as it will act like an arrow pointing straight out of your picture.
Next up is balancing subjects in composition, here the trick is to keep things asymmetrical and to remember that objects in the distance become smaller. You can also create balance in your drawing by balancing dark and light values, the same way you would your objects. It will also help by using odd numbers of objects together in your drawing as apposed to even numbers i.e maybe three tress on one side counterbalanced by five on the other instead of four on one side and four on the other.
To help you decide what the best composition for your drawing is you can use the SOUL method.
This is probably also best explained using pictures and Brenda definitely knows how to do that.
In order to plan your drawing you need to concentrate on composition and the book highlights 7 elements of composition, these are listed as follows:
Focal point: Your primary center of interest
Overlapping: Visual separation between fore and background
Negative space: The empty space within your drawing
Lines: These guide the viewer through your drawing
Balance: A stable balance of objects within your composition.
Contrast: Difference between your light and dark values
Proportion: The amount of space allocated to the various components of a drawing.
Sounds like a lot to take in but if you grab a picture of a painting done by a fairly good artist it will be quite easy to pick out all the above points within that picture. Next Brenda explains how to go about placing your focal point within the picture and how to emphasise it. I will warn you now that this chapter is full of tips, so this might be a long one...
There are a few rules when working with your focal point; number one - always place your focal point off center, if you place your subject in the middle it will command all the viewers attention. Rule number two - Make good use of secondary focal points, by drawing less interesting objects around your focal point you help direct the viewers attention back to you focal point. Rule three - Use objects within your drawing to point to your focal point, i.e a fence or road etc and rule four - draw your focal point in more detail and with greater contrast to the rest of the objects within your drawing.
So far so good, it’s not all that complicating now comes the most important rule of all, the rule of thirds! Anyone doing photography will know this rule all to well already. The rule of thirds is really simple and the best way to describe it is to show you. In the picture below where the circles are drawn at the overlapping intersections is the best place to place your focal point/main subject. Simple!

Next up is balancing subjects in composition, here the trick is to keep things asymmetrical and to remember that objects in the distance become smaller. You can also create balance in your drawing by balancing dark and light values, the same way you would your objects. It will also help by using odd numbers of objects together in your drawing as apposed to even numbers i.e maybe three tress on one side counterbalanced by five on the other instead of four on one side and four on the other.
To help you decide what the best composition for your drawing is you can use the SOUL method.
This is probably also best explained using pictures and Brenda definitely knows how to do that.
 |
| S: Uses curved lines to help the viewer move through the picture |
 |
| O: Uses objects to frame the focal point |
 |
| U: uses your object to frame the picture |
 |
| L: Places your objects on one end and leads them through to the opposite end |
Almost there, I did warn you this was a long chapter. Next we cover ‘plotting out your photograph’ start with drawing a grid on you picture and then duplicate that grid on your drawing paper, this will help towards the accuracy of your drawing. You may need to take the following into account, Scaling up or down. If you are drawing your picture larger than the photograph you will need to take your photograph grid measurements and multiple it to get the size you want, or dived it if you want it smaller.
So to end it all the last tip for the day is: Make a frame that you can use to help find composition/pictures, it helps by blocking out access visual distractions. You can make it any size although it is suggested that you keep it small.

Project 10: Planning composition, takes you through the above 'plotting your photograph' paragraph and shows you how to create a picture from two separate scenes. The pictures below will demonstrate the steps Brenda uses to plot and plan her drawings.
So to end it all the last tip for the day is: Make a frame that you can use to help find composition/pictures, it helps by blocking out access visual distractions. You can make it any size although it is suggested that you keep it small.

Project 10: Planning composition, takes you through the above 'plotting your photograph' paragraph and shows you how to create a picture from two separate scenes. The pictures below will demonstrate the steps Brenda uses to plot and plan her drawings.
 |
| These are the pictures Brenda would like to combine and draw |
 |
| Step One: Grid and composition basics |
 |
| Step 2: Draw the outline of the objects that you would like incorporated |
 |
| Step 3: Rough sketch of shading & Step 4: Re draw and shade properly |
Looks easy hey :), well with enough practise I'm 100% confident that anyone can reproduce the images they wish to draw.
Next up is Chapter 11: Recording your life in a sketchbook. Sounds exciting.
(Please note: that photo examples are taken from "Drawing for Dummies by Brenda Hoddinott'' and the above views are not representative of her and are purely based on a 3rd party view being Me! All snippets taken directly from the book are stated as been so)
Next up is Chapter 11: Recording your life in a sketchbook. Sounds exciting.
(Please note: that photo examples are taken from "Drawing for Dummies by Brenda Hoddinott'' and the above views are not representative of her and are purely based on a 3rd party view being Me! All snippets taken directly from the book are stated as been so)
Subscribe to:
Posts (Atom)